
Continuous vulnerability scanning checks assets automatically on a recurring and event-driven basis so new weaknesses do not wait for the next quarterly review. If you want to know how to set up continuous vulnerability scanning, start by building a live asset inventory, defining ownership and scope, combining authenticated and unauthenticated coverage, choosing safe scan locations, scheduling by risk, prioritizing with exploit intelligence, routing findings into remediation workflows, and rescanning every fix. The goal is not to scan everything every minute. It is to shorten the time between new exposure, detection, prioritization, and verified remediation.
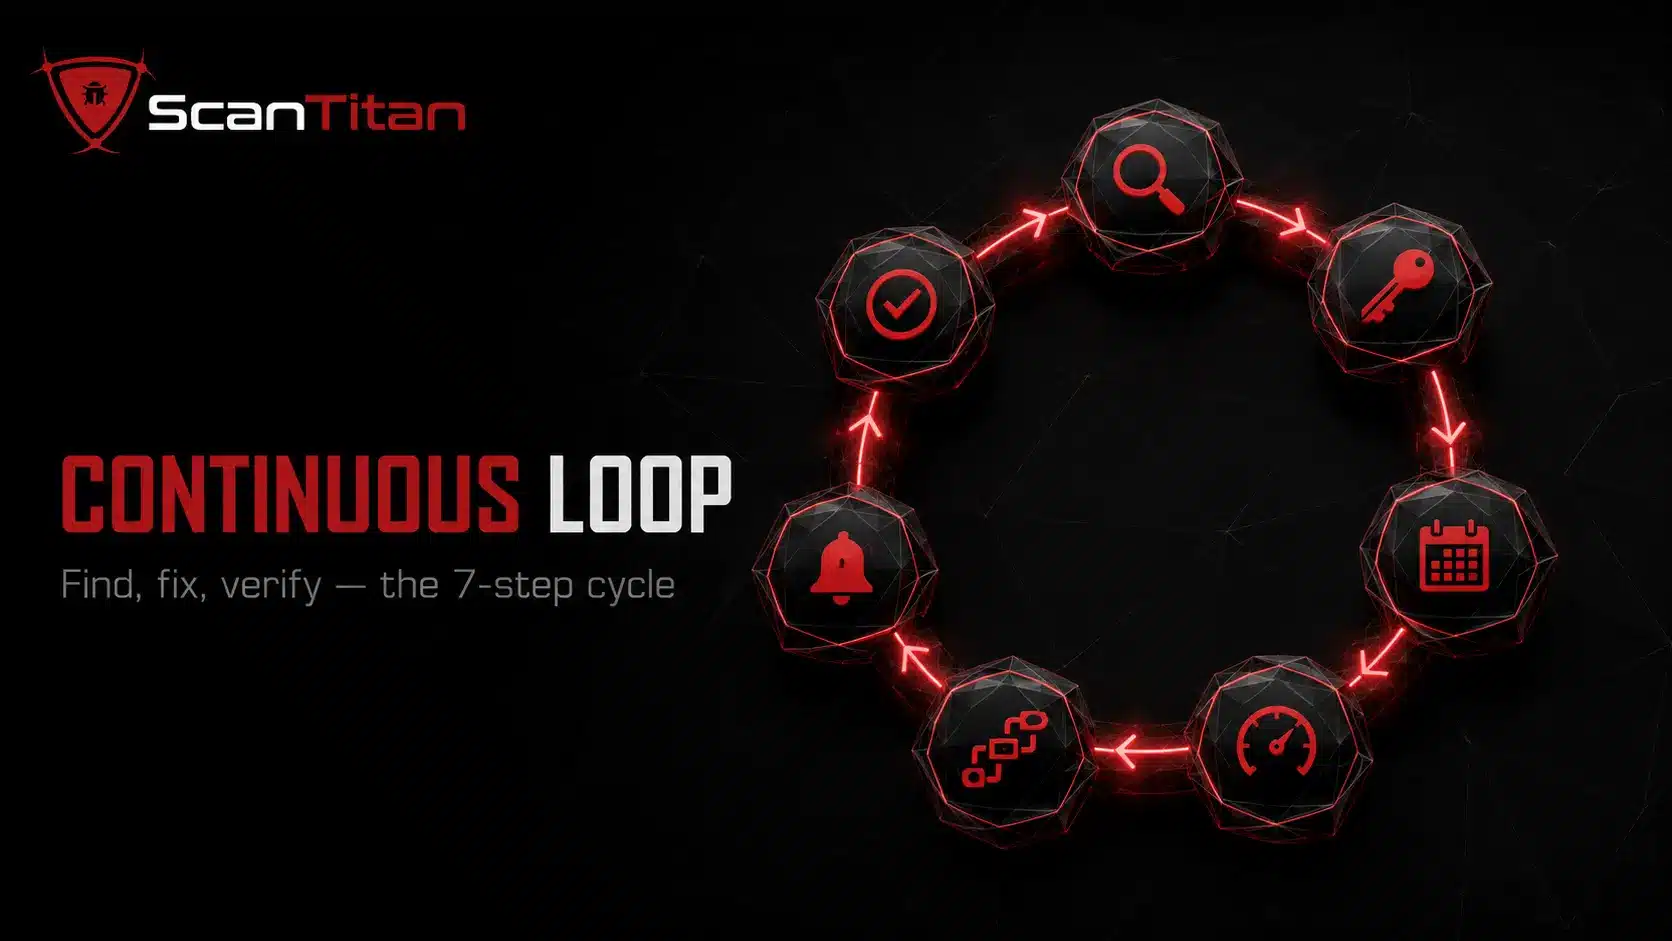
Short answer: Set up continuous vulnerability scanning as a closed loop: discover assets, scan from the right viewpoints, prioritize real exposure, assign the finding, remediate it, and verify the fix with a rescan. Use scheduled scans plus event triggers such as deployments, newly published vulnerabilities, asset changes, and security-group changes. Continuous scanning should support your vulnerability management program, not create a larger backlog of unowned alerts.
What Is Continuous Vulnerability Scanning?
Continuous vulnerability scanning is an automated process for repeatedly checking systems, applications, networks, cloud assets, and software components for known vulnerabilities and insecure configuration. “Continuous” does not mean sending a full intrusive scan every few minutes. A mature program combines recurring scans with event-driven checks when the environment or threat intelligence changes. NIST vulnerability monitoring guidance calls for scanning at an organization-defined frequency and when newly identified vulnerabilities may affect the system. The OWASP DevSecOps Guideline also recommends incorporating vulnerability scanning into delivery pipelines and distinguishes authenticated from unauthenticated infrastructure scans. If you need the broader foundation first, read what network vulnerability scanning is.
A continuous program normally combines four triggers:
- Schedule recurring scans based on asset risk and exposure.
- Trigger scans after deployments, configuration changes, new assets, or network changes.
- Re-evaluate known software when new vulnerability intelligence affects an installed component.
- Verify remediation by rescanning the exact asset and finding after the fix.
What Do You Need Before You Set Up Continuous Scanning?
The scanner is not the first requirement. Visibility, ownership, credentials, and safe operating rules come first. For internet-facing sites, a website vulnerability scanner can provide recurring application checks alongside the broader infrastructure program. If those foundations are missing, automation simply produces findings that nobody trusts or owns.
Build a Live Asset Inventory
Create a living inventory of every asset that can create cyber exposure: public domains, subdomains, IP ranges, servers, endpoints, web applications, APIs, databases, cloud workloads, containers, and critical software components. Pull inventory data from DNS, cloud accounts, configuration management databases, deployment platforms, and other authoritative systems instead of maintaining a spreadsheet by hand. Tag each asset with an owner, environment, internet exposure, business criticality, and data sensitivity. FedRAMP scanning guidance similarly emphasizes unique asset identifiers that map findings back to an inventory. Your inventory should also capture ephemeral and cloud assets that may exist for hours rather than months. The operational rule is simple: a newly discovered production asset should enter an approved scanning scope without waiting for the next quarterly inventory exercise.
Define Scope, Ownership, and Authorization
Define which assets can be scanned, from where, with which techniques, and who owns the results. Separate public-facing assets from internal systems and identify any sensitive operational technology, legacy systems, or fragile applications that require restricted testing. Assign a named technical owner and business owner before scanning begins. Document exclusions, maintenance windows, rate limits, and escalation contacts so security does not discover the rules during an outage. If third-party or hosted assets are involved, confirm that your contract and provider policy authorize the testing method. For a lean team, a narrow but complete scope is better than a broad program with no remediation capacity. Review the difference between internal and external vulnerability scanning when deciding which network positions must be represented.
Prepare Authentication and Safe Scan Accounts
Authenticated scanning can inspect installed software, patch levels, services, and configuration that an external probe cannot see. Create dedicated assessment accounts with only the privileges required for reliable checks, protect those credentials in a secrets vault, rotate them, and monitor their use. Do not reuse an administrator’s personal account. Test authentication before trusting the scan result because a “successful” job with failed credentials can create false confidence. FedRAMP legacy scanning guidance required authenticated scans wherever possible for higher-impact systems and machine-readable evidence of authentication status, which illustrates why scan quality depends on proving the scanner actually reached the intended depth. Our guide to authenticated vs unauthenticated vulnerability scanning explains what each viewpoint can and cannot detect.
How to Set Up Continuous Vulnerability Scanning Step by Step?
Use the sequence below as the operating model. Each step should produce a measurable output, not just a scanner setting.
Discover and Tag Every Asset
Start by reconciling the asset inventory with what is actually reachable. Enumerate approved domains, subdomains, IP ranges, cloud resources, web applications, APIs, and exposed services, then compare discovered assets with your inventory. Investigate anything unexpected before automatically treating it as trusted production scope. Tag every confirmed asset with owner, environment, exposure, criticality, and data classification so the scanner can route and prioritize findings later. Discovery must continue after the initial rollout because cloud instances, containers, staging hosts, and marketing sites appear and disappear constantly. Good tagging is what lets one scanner distinguish a low-value test host from a public customer portal. It also prevents the common failure where a critical finding spends days moving between teams because nobody knows who owns the asset.
Combine External, Internal, Authenticated, and Unauthenticated Coverage
No single scan viewpoint gives a complete result. Use unauthenticated external scans to understand what an outside attacker can reach, including open services, TLS issues, exposed panels, and application behavior. Use internal scanning to identify weaknesses reachable after a user or attacker enters a trusted network. Add authenticated scans for patch levels, installed packages, local configuration, and software versions that cannot be reliably inferred remotely. For web applications and APIs, add application-layer testing rather than assuming a network scanner can detect authorization or business-logic flaws. The goal is complementary evidence, not duplicate scans. Map each asset class to the scan method that can actually inspect it. If you are deciding how much external and internal coverage you need, use the internal vs external vulnerability scanning comparison as a scope check.
Place Scanners, Agents, and Connectors Where They Can See the Asset Safely
Scanner placement affects both accuracy and operational risk. Put network scanning engines close enough to the target environment that firewalls, routing, and network address translation do not hide the very services you intend to assess. When remote or intermittently connected endpoints cannot be reached reliably, an agent may provide better local visibility. Cloud and SaaS environments may use API connectors or agentless checks instead of a traditional scanner appliance. Test the chosen method on a small asset group before scaling it, then tune concurrency, bandwidth, timeouts, and maintenance windows so scans do not overwhelm fragile services. Keep scanner infrastructure hardened and restrict who can change scan policies. If you are choosing a deployment model, our agentless vs agent-based scanning guide explains the visibility and operational trade-offs.
Set a Risk-Based and Event-Driven Scan Cadence
Do not define “continuous” as one universal schedule. Set a baseline cadence for each asset tier, then add triggers that start a scan or re-evaluation when risk changes. Internet-facing and business-critical assets normally deserve more frequent checks than isolated development systems. Trigger additional assessment after a deployment, major firewall or security-group change, new public asset, emergency patch, or newly published vulnerability that may affect installed software. NIST guidance explicitly supports scanning when new vulnerabilities affecting the system are identified. FedRAMP’s current Continuous Vulnerability Management Standard RFC-0012 gives a useful high-assurance example: it calls for authenticated and unauthenticated assessment of internet-reachable resources at least every three days, while some non-internet-reachable authenticated resources have a monthly minimum. Those are FedRAMP requirements, not a universal cadence for every organization.
| Asset tier | Practical baseline | Trigger additional assessment when |
|---|---|---|
| Public critical services | Daily or several times per week | Deployments, new KEV/CVE relevance, firewall changes |
| Public standard services | Several times per week or weekly | Version changes, new exposure, major advisory |
| Internal critical systems | Weekly or risk-defined | Patch/configuration changes, threat intelligence |
| Low-risk development assets | Weekly or monthly | Before release or exposure to production traffic |
| Software dependencies and images | On build plus advisory-driven re-evaluation | New advisory matches the component or image |
Prioritize With CVSS, EPSS, KEV, Exposure, and Asset Context
A continuous scanner that sorts only by severity will overwhelm the team. Use CVSS (Common Vulnerability Scoring System) for technical severity, then add exploitability and business context. FIRST CVSS provides the scoring framework, while EPSS estimates the probability that a published CVE will be exploited in the wild. The CISA Known Exploited Vulnerabilities catalog identifies vulnerabilities with evidence of exploitation. Add whether the asset is internet-facing, whether authentication is required, the privilege gained, the data or service at risk, and whether compensating controls reduce reachability. A lower CVSS issue on a public identity service can outrank a higher-scored flaw on an isolated test host. Use a documented methodology such as the one in how to prioritize vulnerability remediation.
Integrate Scanning With CI/CD, Images, and Software Inventories
Production scanning catches exposed weaknesses, but some problems should be blocked before deployment. Add appropriate security tests to the CI/CD pipeline for code, dependencies, containers, infrastructure-as-code, and running test environments. OWASP’s DevSecOps guidance covers SAST (Static Application Security Testing), DAST (Dynamic Application Security Testing), SCA (Software Composition Analysis), container scanning, and infrastructure scanning as complementary pipeline activities. Maintain an SBOM (Software Bill of Materials) or equivalent software inventory so newly published advisories can be matched against components already deployed. This advisory-driven model matters because a dependency can become known-vulnerable even when no new code was pushed. Scan container images before production and repeat evaluation when the image, package inventory, or vulnerability intelligence changes. Do not rely on a single pipeline gate as proof that the live environment remains secure after deployment.
A simple policy can express the workflow without tying the article to one CI/CD vendor:
scan_on:
  - pull_request
  - deploy
  - relevant_advisory_match
fail_or_block_when:
  - critical_reachable_finding
  - relevant_kev
exception:
  documented: true
  expires: required
rescan_after_fix: trueRoute Findings Into Remediation Workflows With Clear SLAs
A finding becomes useful only when someone can act on it. Send validated findings into the team’s existing workflow, such as Jira, ServiceNow, Slack, Teams, or another ticketing and notification platform. Include the asset, owner, vulnerability identifier, evidence, severity, exploitability context, affected version, fixed version when known, and remediation guidance. Define remediation SLAs by risk rather than using one deadline for every finding. Route critical exposed findings immediately and batch low-risk issues for planned review so alert volume does not destroy attention. Create an exception process for findings that cannot be fixed within the normal SLA, including an expiry date and compensating controls. The broader distinction between finding vulnerabilities and reducing exposure is covered in vulnerability management vs exposure management.
Rescan Every Fix and Measure the Closed Loop
Do not close a vulnerability because a patch ticket says “done.” Trigger a targeted rescan after remediation and verify that the exact finding no longer exists on every affected asset. If the weakness remains, reopen the ticket with fresh evidence. Keep the before-and-after scan result for auditability and trend analysis. This verification step also exposes deployment drift, failed patches, forgotten replicas, and secondary instances that remediation workflows often miss. Measure the time from exposure or disclosure to detection, the time from validated detection to remediation, and the time from remediation to verified closure. Compare consecutive scans to identify repeat findings and controls that fail to stay fixed. A closed-loop process is what turns continuous vulnerability scanning into measurable vulnerability reduction rather than continuous alert generation.
Continuous Scanning vs Periodic Scanning: What Changes?
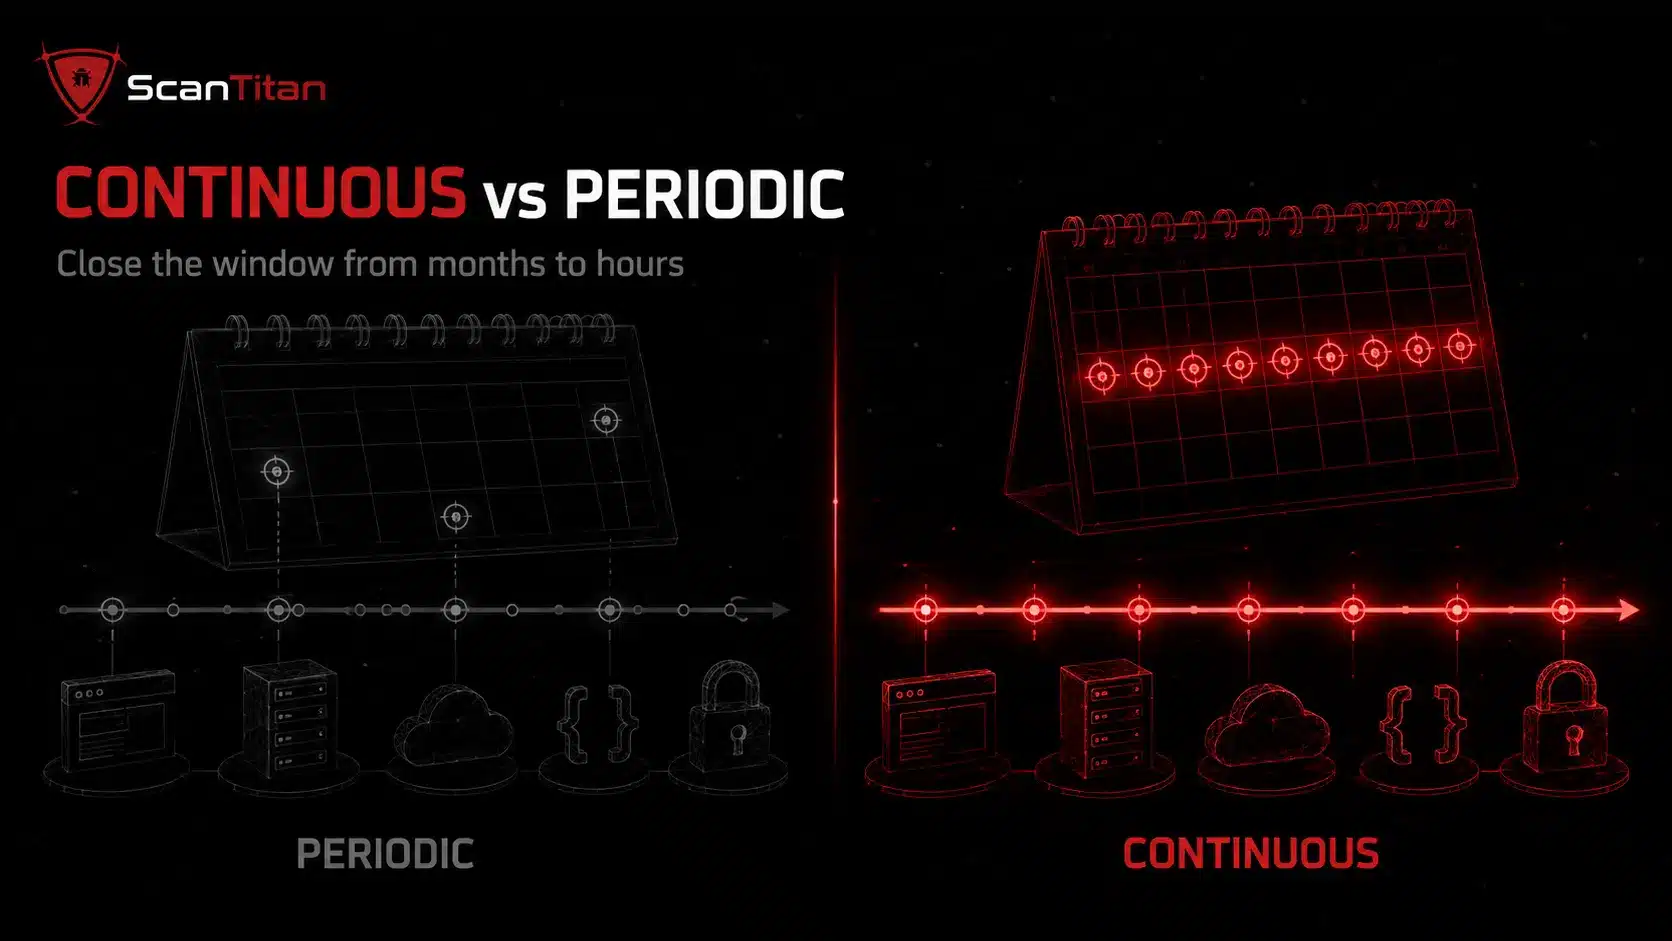
Periodic scanning gives you a point-in-time snapshot. Continuous scanning shortens the gap between environmental change and the next security check by combining recurring jobs with event-driven and advisory-driven triggers. The difference matters most in environments where assets, software, cloud configuration, and vulnerability intelligence change faster than the audit calendar. Continuous scanning does not remove the need for scheduled compliance scans or periodic human review. It adds a detection and verification layer between those checkpoints.
| Factor | Periodic scanning | Continuous vulnerability scanning |
|---|---|---|
| Detection window | Weakness may wait until the next scheduled assessment | New exposure can trigger assessment sooner |
| New assets | May remain unseen until inventory or scan scope is updated | Discovery and connectors can bring new assets into scope |
| New vulnerability intelligence | Often reviewed during the next cycle | Installed software can be re-evaluated when relevant advisories appear |
| Verification | Rescans may happen manually | Remediation can trigger targeted verification automatically |
| Best fit | Stable environments and formal point-in-time checks | Dynamic websites, APIs, cloud, software delivery, and changing attack surfaces |
What Should Continuous Vulnerability Scanning Cover?
Coverage should follow the real attack surface, not the licensing categories of one scanner. Most organizations need multiple scanning techniques because network services, web applications, APIs, software dependencies, containers, and cloud configuration expose different classes of weakness.
| Coverage area | What continuous scanning should look for | Related ScanTitan guide |
|---|---|---|
| Network and infrastructure | Open services, vulnerable software, TLS issues, missing patches, insecure configuration | Network vulnerability scanning |
| Web applications | Injection, XSS, access-control flaws, vulnerable components, security misconfiguration | Types of website security vulnerabilities |
| APIs | Authentication, authorization, data exposure, endpoint inventory, API misconfiguration | How to scan an API for vulnerabilities |
| Dependencies and plugins | Installed versions, known CVEs, vulnerable packages, unsupported components | WordPress plugin vulnerabilities |
| Containers and images | OS packages, application dependencies, base-image vulnerabilities | CI/CD and image scanning workflow |
| Cloud configuration | Public storage, exposed databases, excessive permissions, network exposure | What is a cloud security scan? |
The OWASP DevSecOps Guideline is useful here because it treats application, software-composition, container, infrastructure, and infrastructure-as-code checks as complementary security activities rather than one universal scan.
How Is Continuous Vulnerability Scanning Different From Continuous Monitoring?
Continuous vulnerability scanning and continuous monitoring overlap, but they answer different questions. Scanning asks, “What known weakness or insecure configuration is present?” Monitoring asks, “What is happening in the environment right now?” Vulnerability management is broader than both because it includes governance, prioritization, ownership, remediation, exceptions, and verification.
| Capability | Main question | Typical evidence |
|---|---|---|
| Continuous vulnerability scanning | What known weaknesses are present now? | Scan findings, CVEs, configuration checks, versions |
| Continuous monitoring | What activity or change is happening now? | Logs, events, telemetry, alerts, behavior |
| Vulnerability management | Which vulnerabilities must we fix, by when, and who owns them? | Risk decisions, SLAs, tickets, remediation status |
| Penetration testing | Can an assessor combine weaknesses into a realistic attack path? | Manual test evidence, exploit chains, impact validation |
Automated scanning does not replace manual penetration testing. It gives breadth and cadence, while manual testing can validate exploit chains, business logic, and weaknesses that automated signatures miss. See vulnerability scanning vs penetration testing for the boundary between them.
What Does a Practical Continuous Scanning Program Look Like for a Small Team?
A small security or IT team should start with coverage it can actually remediate. Put the highest-risk public assets, customer-facing applications, core APIs, and critical infrastructure into the first scope, then automate ownership, ticket creation, and verification before adding lower-value systems. Use a common prioritization model so the same finding does not receive different urgency in different tools. Keep urgent notifications narrow and batch lower-risk work into planned reviews. One platform is not mandatory, but fragmented scanners should still feed a shared asset inventory and remediation queue. Manual spot checks remain useful for validating scanner blind spots, and checking a website for vulnerabilities manually can complement automation. The target is a reliable closed loop, not the largest possible daily scan count.
How Do You Reduce False Positives, Scan Failures, and Performance Problems?
Continuous scanning fails when teams optimize for scan count instead of scan quality. Start by proving authentication success and asset identity. A credentialed job that silently falls back to limited access can miss patches while still producing a completed scan status. Tune rate limits, concurrency, and timeouts for fragile services, and schedule deeper checks during approved windows when necessary. Keep destructive checks disabled unless you have explicit authorization and a controlled environment. Track excluded assets and ports so exceptions do not become permanent blind spots. Review recurring false positives and suppress only with documented evidence and an expiry or revalidation date. Update scanner signatures and vulnerability intelligence regularly. Where possible, export findings in structured formats and preserve enough evidence to reproduce the result. FedRAMP’s scanning guidance emphasizes authentication status, structured machine-readable findings, updated vulnerability signatures, unique asset IDs, and scanner configuration integrity for the same reason: repeatable scanning requires operational control, not just automation.
Which Metrics Show Whether Continuous Scanning Is Working?
Do not measure success by the number of scans or findings. Measure whether coverage improves and exposure closes faster.
- Track asset coverage. Measure the percentage of in-scope assets that were successfully scanned with the intended method and authentication depth.
- Track detection latency. Measure how quickly a relevant new vulnerability, asset, or configuration change becomes a validated finding.
- Track remediation time. Measure time from validated finding to implemented fix by risk tier.
- Track verification time. Measure how quickly remediated findings receive a clean rescan.
- Track recurrence. Identify vulnerabilities or configuration problems that return after remediation.
- Track SLA performance. Measure the percentage of findings closed within the risk-based deadline or covered by a current approved exception.
MTTD (Mean Time to Detect) and MTTR (Mean Time to Remediate) can be useful, but always segment them by exposure and criticality. A single blended average can hide a slow response to the assets that matter most.
How Does Continuous Scanning Support Compliance Without Overclaiming It?
Continuous scanning can create useful evidence for security and compliance programs, but it does not make an organization compliant by itself. The safe way to describe the value is to map scanning, prioritization, remediation, and verification to the requirements that actually apply.
- Support NIST vulnerability monitoring. NIST SP 800-53 Rev. 5 RA-5 calls for vulnerability monitoring and scanning at an organization-defined frequency and when new vulnerabilities potentially affecting the system are identified. That supports scheduled and advisory-driven scanning rather than a one-size-fits-all cadence.
- Follow FedRAMP frequencies when FedRAMP applies. FedRAMP’s continuous vulnerability management program defines specific scanning and assessment expectations for cloud service providers in scope. Those requirements are a high-assurance benchmark, not a universal default for every private company.
- Complement PCI DSS scanning requirements. PCI DSS includes formal internal and external vulnerability scanning requirements, and some external scans must be performed by a PCI SSC Approved Scanning Vendor. Continuous scanning can reduce exposure between required assessments, but it does not replace an ASV scan when PCI DSS requires one. The PCI Security Standards Council explicitly notes that an ASV scan is only one part of PCI DSS compliance.
- Support NIS2 vulnerability handling. The NIS2 Directive requires covered entities to implement cybersecurity risk-management measures that include vulnerability handling and disclosure, system security, and procedures for assessing the effectiveness of controls. Continuous scanning can supply evidence and faster detection within that broader program.
- Support an ISO/IEC 27001 risk-management process. ISO/IEC 27001:2022 defines requirements for an information security management system and continuous improvement. Vulnerability scanning can provide evidence for risk identification and treatment, but certification depends on the wider ISMS, not the scanner.
- Support audit evidence for control frameworks such as SOC 2. Recurring scan results, ownership, remediation records, exceptions, and clean verification rescans can support evidence that security monitoring and risk-response processes operate over time. The exact control mapping should follow the organization’s selected Trust Services Criteria and auditor interpretation rather than a generic claim that scanning “satisfies SOC 2.”
Keep dated scan results, authentication status, asset coverage, risk decisions, remediation tickets, exceptions, and verification rescans. Compliance reviewers care about whether the control operates consistently, not whether the product dashboard uses the word “continuous.”
Continuous Vulnerability Scanning FAQ
How Often Should Continuous Vulnerability Scanning Run?
There is no one cadence that fits every asset. Use risk, exposure, rate of change, regulatory requirements, and operational sensitivity to define the schedule. Public critical systems may need daily or multi-weekly assessment plus event-triggered rescans, while lower-risk internal systems may run weekly or monthly. Scan or re-evaluate sooner when a relevant vulnerability is disclosed, an asset becomes public, software changes, or a firewall rule changes. NIST guidance intentionally uses organization-defined frequency, while regulated programs such as FedRAMP can set concrete minimum intervals. The important design principle is to make the detection window shorter than the period in which an important exposure could remain unnoticed.
Do I Need Authenticated Scanning?
Use authenticated scanning wherever it materially improves visibility and the target supports it safely. Authenticated scans can inspect installed packages, missing patches, local configuration, and software versions that remote fingerprinting may miss. They should complement, not replace, unauthenticated external scans because the outside-in view shows what an attacker can reach without credentials. Protect assessment accounts, confirm authentication succeeds, and use the least privilege that still produces reliable checks. If authenticated scanning fails silently, the team may assume the environment received deep coverage when it did not. That makes authentication status a scan-quality metric, not just a setup option.
Does Continuous Scanning Replace Penetration Testing?
No. Continuous vulnerability scanning automates broad, repeatable detection of known weaknesses and configuration issues. Penetration testing uses human judgment to investigate exploitability, chain weaknesses, test business logic, and demonstrate impact under an agreed scope. Run scanning continuously or at a risk-based cadence, then schedule penetration testing according to risk, major changes, and regulatory requirements. The two activities answer different questions and should feed the same remediation program. Scanning is strongest at repeatable coverage across many assets, while penetration testing is strongest when a skilled assessor must understand context, combine weaknesses, validate controls, or test a workflow that a signature cannot judge reliably. Keep both results in the same ownership and remediation process so a manual finding does not disappear into a separate reporting track.
Is Continuous Scanning the Same as Continuous Vulnerability Management?
No. Scanning is the detection component. Continuous vulnerability management adds inventory, threat intelligence, risk prioritization, remediation ownership, patching, exceptions, verification, and metrics. A company can run a scanner every day and still have a weak vulnerability-management program if critical findings remain unowned for weeks. The objective is continuous risk reduction, not continuous collection of findings. A mature program also tracks whether the asset inventory is complete, whether authentication worked, whether an exception is still justified, whether the fix reached every affected instance, and whether the same weakness returned later. In other words, scanning creates evidence. Vulnerability management decides what the organization does with that evidence and proves the risk was reduced.
How Do Small Teams Avoid Alert Fatigue?
Automate routing and prioritization before increasing scan frequency. Suppress duplicate noise, validate authentication and asset identity, enrich findings with CVSS, EPSS, KEV status, exposure, and asset criticality, and page a person only for findings that meet a defined urgent threshold. Give every asset an owner and every exception an expiry date. Batch lower-risk work into planned reviews. Tune notifications so a repeated finding updates the existing work item instead of creating a new ticket every day. Review suppression rules regularly so a temporary false-positive decision does not become a permanent blind spot. For a small team, the best continuous scanning program is the one that continuously closes high-value exposure without turning the ticket queue into a second vulnerability database.
Start With a Closed-Loop Continuous Scanning Program
Continuous vulnerability scanning works when every scan has a purpose and every important finding has an owner. Build the asset inventory first, combine the right scan viewpoints, deploy scanners safely, define a risk-based and event-driven cadence, prioritize with exploit intelligence and business context, integrate remediation into the tools your team already uses, and verify every fix with a rescan.
ScanTitan supports recurring authenticated and unauthenticated scanning across websites, networks, APIs, and related attack surfaces, with prioritized findings and remediation guidance for lean security and IT teams. Start with your most exposed critical assets, prove the discover, detect, fix, verify loop, then expand coverage without sacrificing scan quality.